🔧GPG Signature Verification in Daedalus Wallet macOS
MacOS GPG signature verification procedure
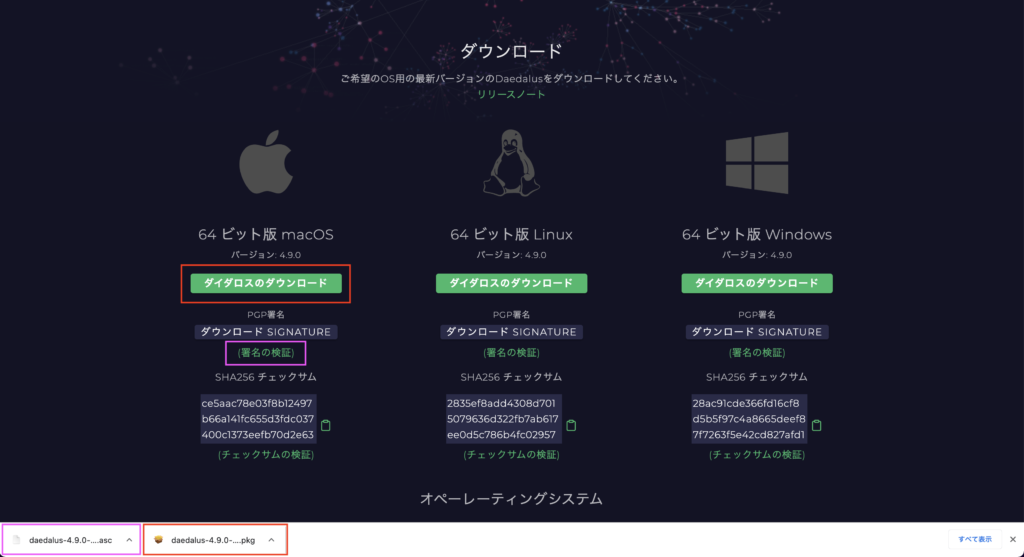
- Get both the installer file
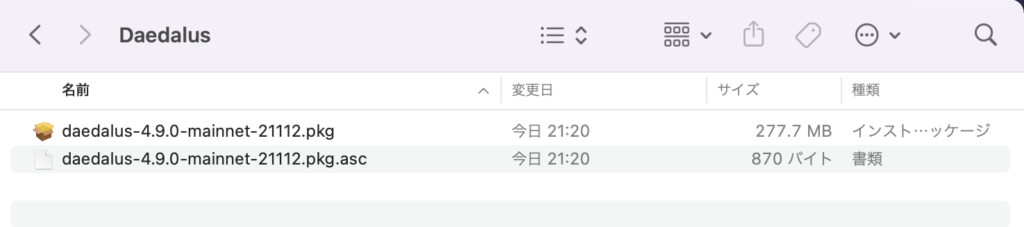
daedalus-*-mainnet-*.pkgand the corresponding signature filedaedalus-*-mainnet-*.pkg.ascand store them in the same directory.
- If you have already installed
GPG Suiteand created a personal key, proceed to step 13.
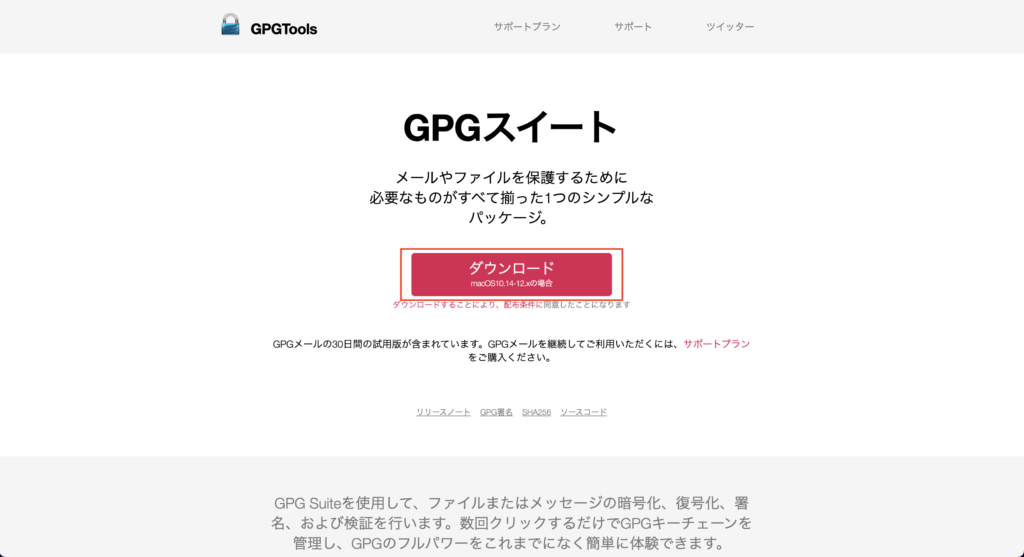
- Go to the GPG Suite section, download and install the
.dmgfile.
- Open the
GPG_Suite-*.dmgfile.

- After GPG Suite is displayed, click
Install.pkgto install it.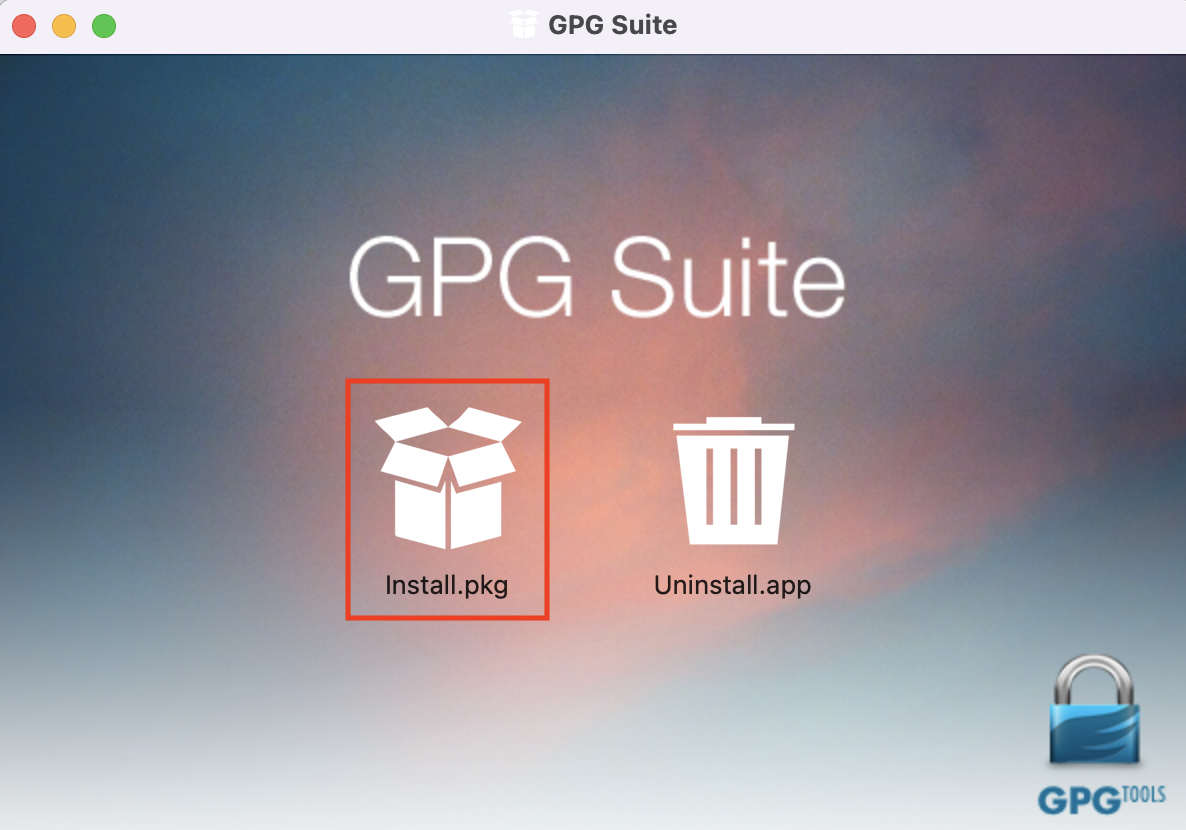
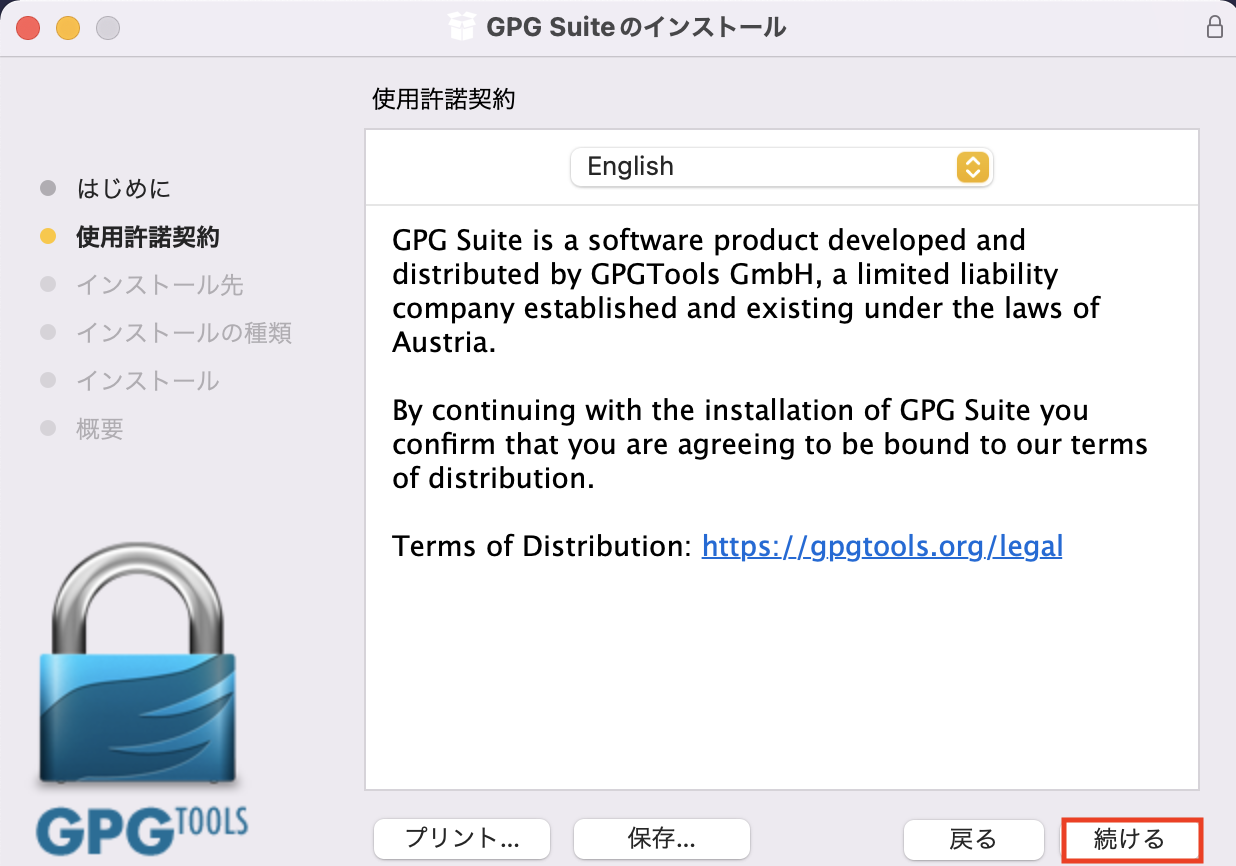
- The installation of GPG Suite will be displayed, so check the contents and click
[Continue].
Thank you for installing GPG Suite. GPGSuite encrypts, decrypts, signs and verifies files and messages. It's easier than ever to manage your keys and experience the full power of GPG. GPGSuite includes:
• GPG Mail
• GPG Keychain
• GPG Services
• GPG Suite Preferences
• MacGPG

- Check the contents and click
[Continue]. If necessary, click[Save]to obtain the License Agreement.pdf.
GPG Suite is a software product developed and distributed by GPGTools GmbH, a limited liability company incorporated and existing under Austrian law. By continuing to install GPG Suite, you agree to be bound by our distribution terms. Distribution conditions: [General terms of distribution "GPG Suite"] (https://gpgtools.org/legal)
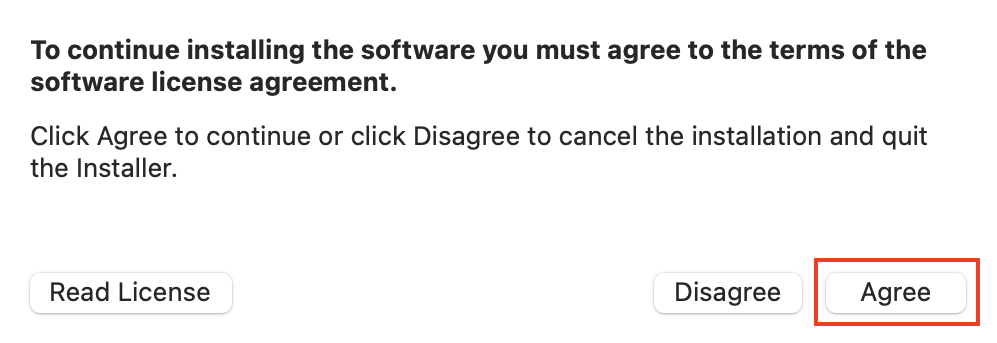
- Check the contents and click
[Agree].
You must accept the terms of the Software License Agreement to continue installing the software. Click I Agree to continue or Disagree to cancel the installation and exit the installer.
- Click
[Install].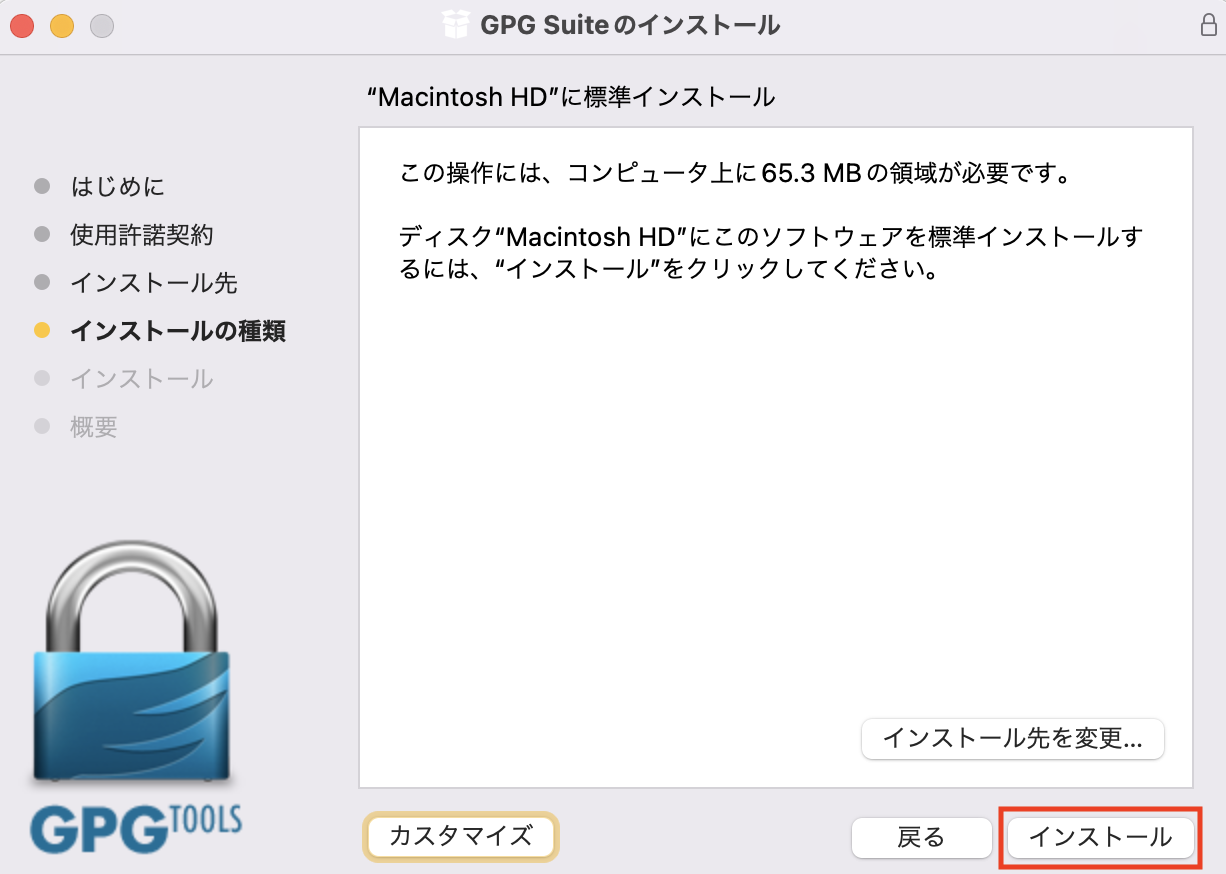
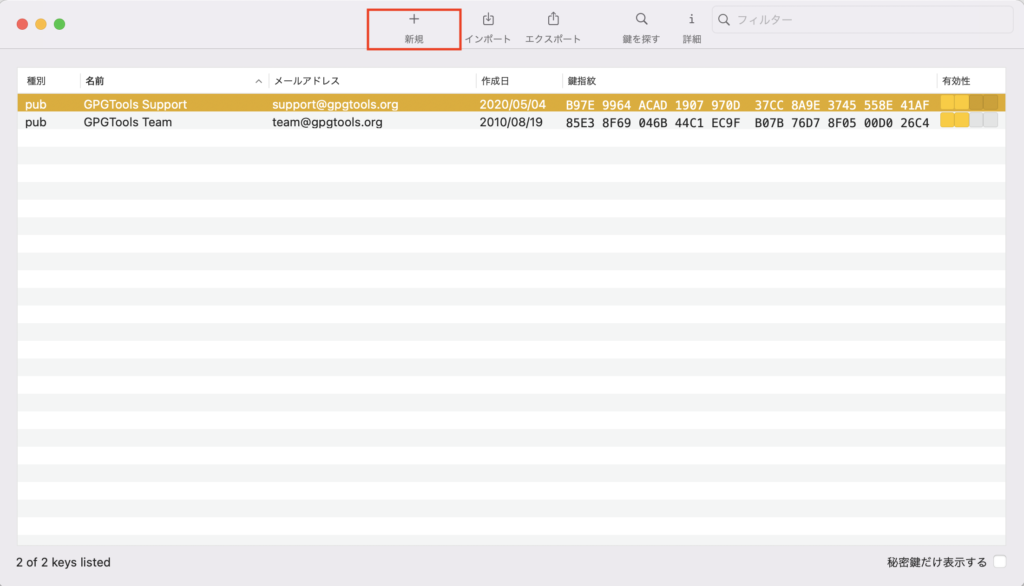
- Find
GPG Keychainfrom Launchpad and expand it.

- Click New.
GPG Keychain is an application used to manage keys. You can create new keys, edit existing keys, or search for your friends' keys. The first thing you see in GPG Keychain is a wizard that guides you through creating your first key.
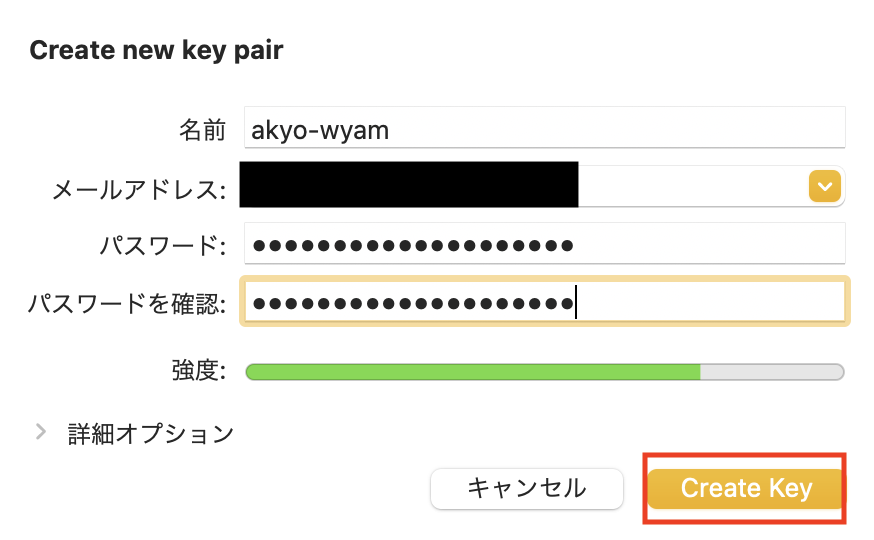
- Enter
name,email address,password,confirm password, and click[Create Key].
GPG Keychain populates macOS Address Book data.
The email field is editable and you are free to change that information.
Enter the email address you normally use when sending emails.
Make sure it's entered exactly like the one used in the Mail app's Settings > Accounts.
It's important, so double check that the case matches.
If you use multiple email addresses, you can add more to your key later.
Enter a password to protect your OpenPGP key. As with all passwords, it's best to use long passwords. IMPORTANT: Please remember your password. Please keep it in a safe place. No, a text note on your desk is not a safe place. Use a password manager or similar instead. If you lose or forget your password, there is no way to recover it and you may lose access to all your encrypted messages.
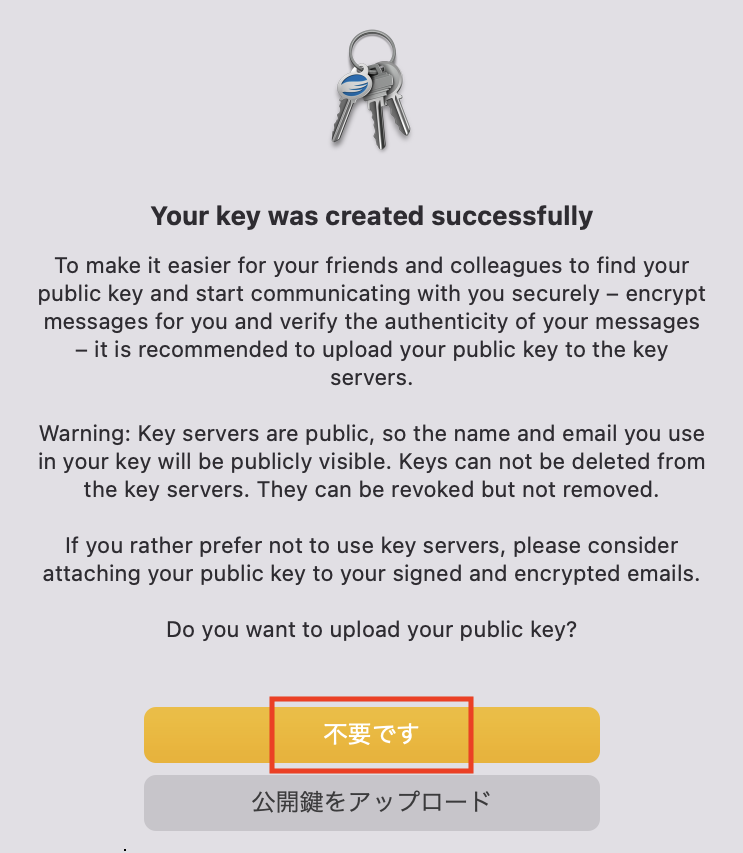
- Click
No needfor now, as you can do it later.
We recommend uploading your public key to a keyserver to encrypt and verify the authenticity of your messages so that your friends and colleagues can find your public key and start communicating securely. WARNING: Since the keyserver is public, the name and email address you use with your key will be public. Keys cannot be deleted from the keyserver. They can be revoked, but not deleted. If you don't want to use a keyserver, consider attaching your public key to signed and encrypted emails. Upload public key? If you're not sure, you can always do it later. keyserver details and upload and verify /upload-and-verify-your-public-key) method.
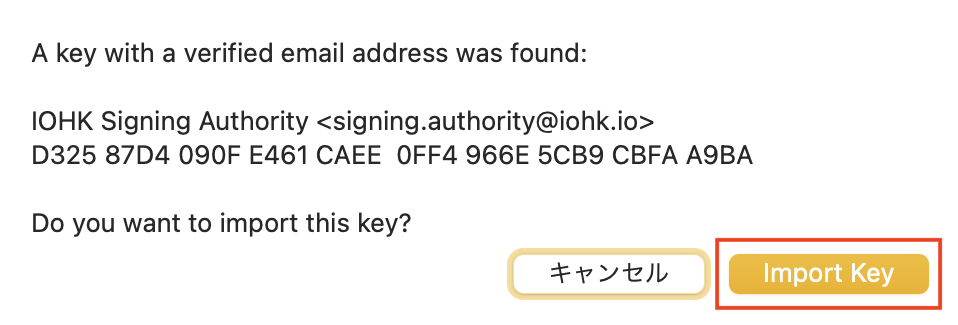
- Click Find Keys.

- Enter the following in the search window of
[Search public key]and click[Search].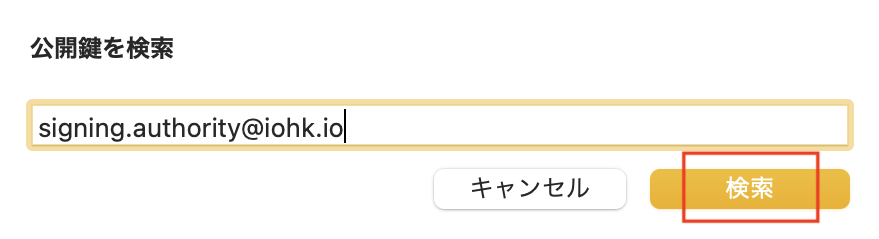
signing.authority@iohk.io
- Check the contents and click
[Import Key].
IOHK signatories<signing.authority@iohk.io>
D325 87D4 090F E461 CAEE 0FF4 966E 5CB9 CBFA A9BA
Do you want to import this key?
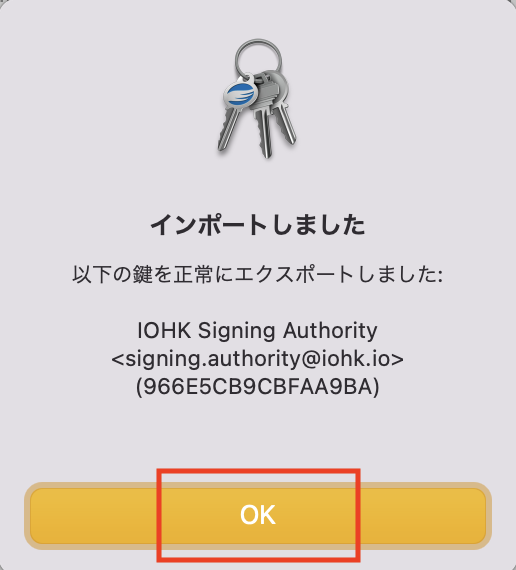
- It will tell you that it has been imported, so click
[OK].
- Right-click on the imported key, then select
Detailsand verify that theFingerPrintof the imported key isD325 87D4 090F E461 CAEE 0FF4 966E 5CB9 CBFA A9BA. If not, you have imported the wrong key, right click and selectDelete.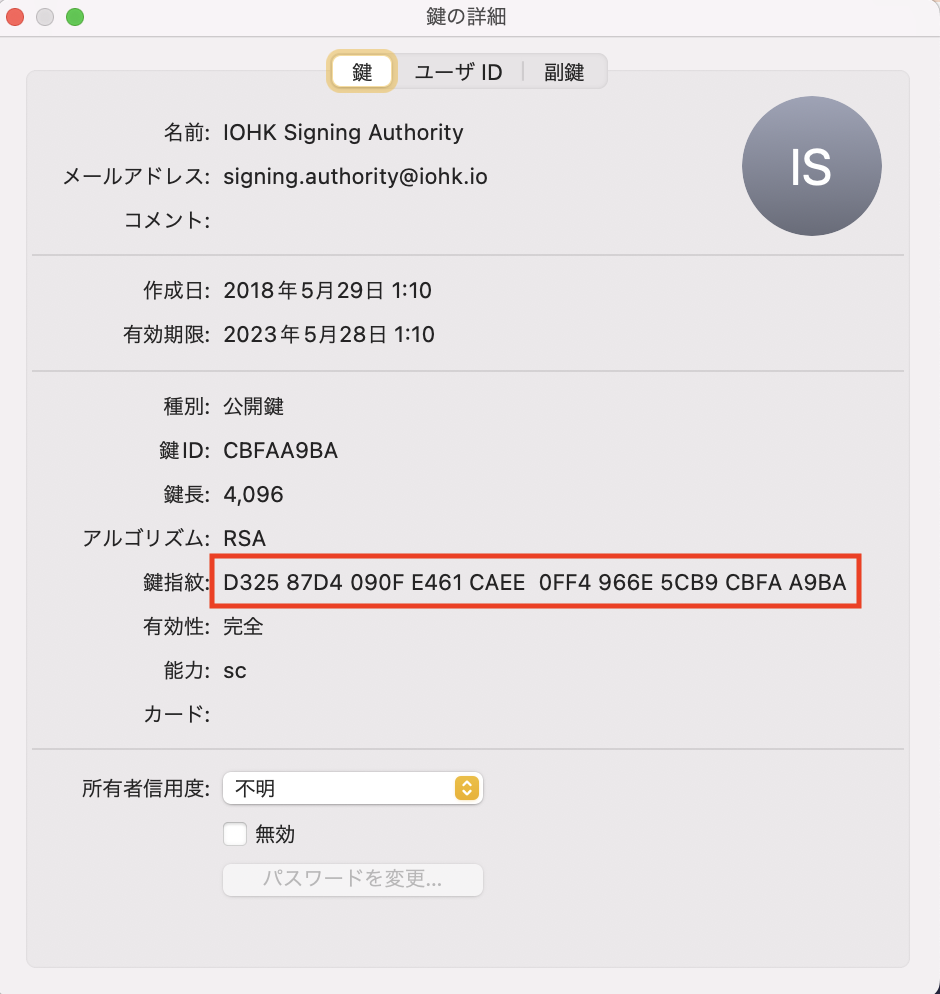
- Select the imported IOHK key, right-click, and then click Sign. This is a necessary next step in authenticating authenticity.
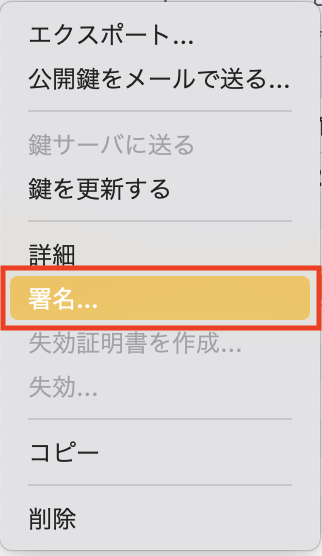
- Check the contents and click
[Sign].
By signing this key, we verify the identity of the owner of the key and confirm that the key D325 87D4 090F E461 CAEE 0FF4 966E 5CB9 CBFAA9BA with FingerPrint belongs to them.
IOHK signatories<signing.authority@iohk.io>
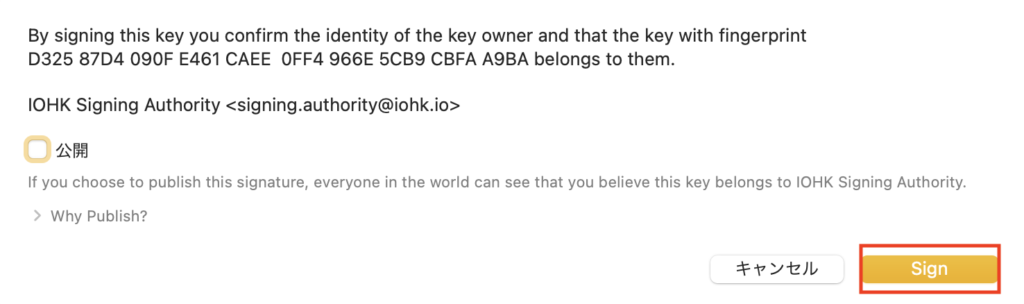
- Enter the passphrase that you wrote down and click
[OK].
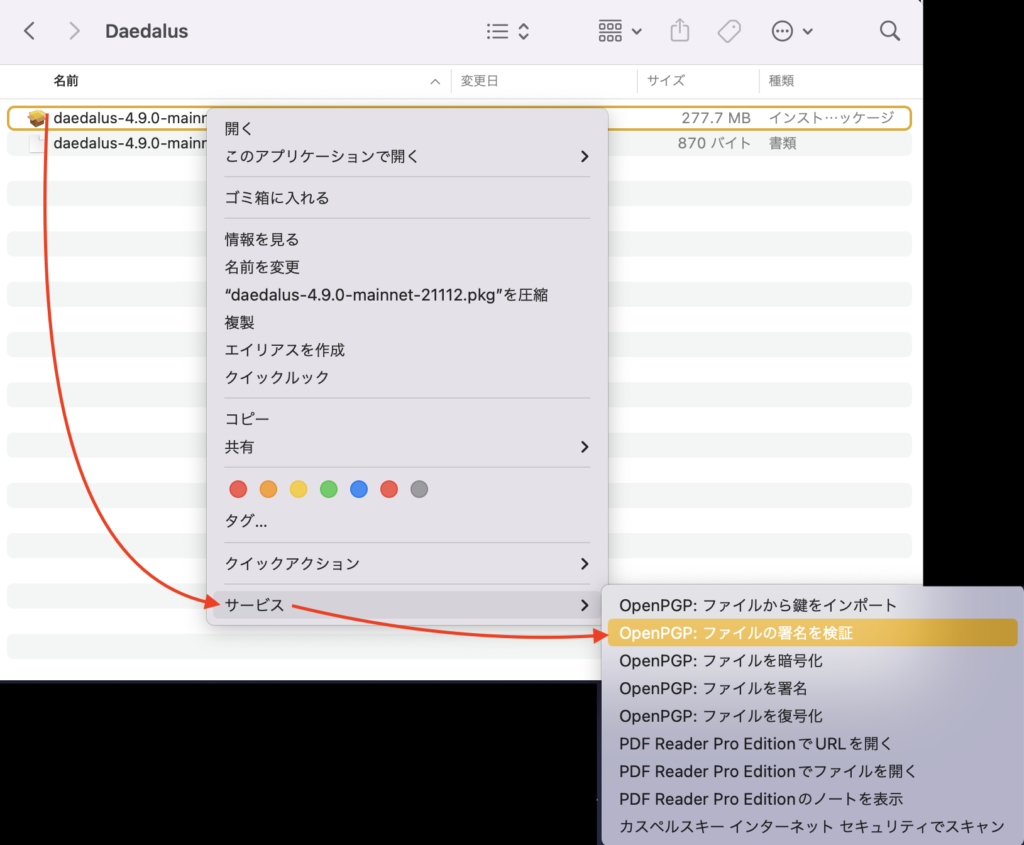
- Validate the installer binaries.
Right-click daedalus-*-mainnet-*.pkg stored in step 1.
Do not right click on the **daedalus--mainnet-.pkg.ascfile. This is invalid. ** Confirm thatdaedalus--mainnet-.pkg.ascis in the same directory, and click[Services]->[OpenPGP: Verify file signature]`.
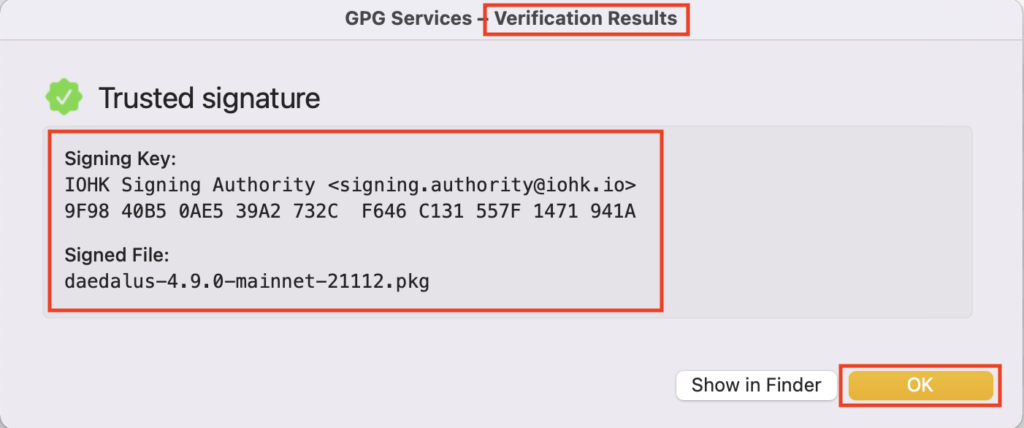
- If the verification result
Verification Resultsis displayed, it was confirmed that it was correct by GPG signature verification, so it was a success! Thank you for your hard work!